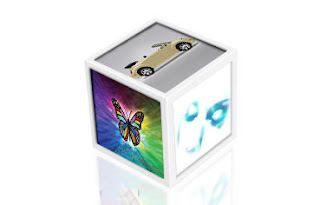
Image Cube | ||||||||
We'll begin this tutorial, by creating a new canvas at a size of 369 x 236 then select the "Pen Tool". Draw the below shape as illustrated using e5e5e5 as the color. | ||||||||
 | ||||||||
Using the "Pen Tool" once again draw the top of the cube as illustrated using f2f2f2 as the color. | ||||||||
 | ||||||||
Next, duplicate the new layer, then go to the main menu and select "Edit" then "Free Transform" and decrease both the width and the height to 87%. | ||||||||
 | ||||||||
You should now have the below image. | ||||||||
 | ||||||||
Next, find an image that you would like to use and put above all other layers in the layers palette. I will be using the below image. Now, with your newly found image that you would like to use selected in the Layers Palette, go to the main menu and select "Layer" then "Create Clipping Mask". | ||||||||
 | ||||||||
Next, go to the main menu once again and select "Edit" then "Free Transform". Using the "Ctrl" key on your keyboard you will be able to drag the individual corners so they are just outside the previous shape which will give it a nice clean edge. | ||||||||
 | ||||||||
You should now have the below image. | ||||||||
 | ||||||||
You should now have the below image. | ||||||||
 | ||||||||
Using the "Pen Tool" once again draw the right side of the cube as illustrated using f2f2f2 as the color. | ||||||||
 | ||||||||
Then resize as in step 3 above. | ||||||||
 | ||||||||
You should now have the below image. | ||||||||
 | ||||||||
Find another image and put above all other layers in the layers palette. I will be using the below image. Now, with your newly found image that you would like to use selected in the Layers Palette, go to the main menu and select "Layer" then "Create Clipping Mask". | ||||||||
 | ||||||||
Resize image again to fit in the cube as illustrated below. | ||||||||
 | ||||||||
Using the "Pen Tool" once again, draw the left side of the cube using f2f2f2 as the color and resize like below. | ||||||||
 | ||||||||
You should now have the below image. | ||||||||
 | ||||||||
Find another image and put above all other layers in the layers palette. I will be using the below image. Now, with your newly found image that you would like to use selected in the Layers Palette, go to the main menu and select "Layer" then "Create Clipping Mask". | ||||||||
 | ||||||||
Resize image again to fit in the cube as illustrated below. | ||||||||
 | ||||||||
You should now have the below image. | ||||||||
 | ||||||||
Now select the "Line Tool" and draw out a White line with a weight of 1. Then another one on the top right and lastly on in the middle edge of the cube. Select all three line layers and merge them, by going to the main menu and selecting "Layer" then "Merge Layers". | ||||||||
 | ||||||||
Now go to "Filter" then "Blur" then "Gaussian Blur" and use the following settings. | ||||||||
 | ||||||||
You should now have the below image. | ||||||||
 | ||||||||
The Results!!! | ||||||||


0 komentar:
Posting Komentar