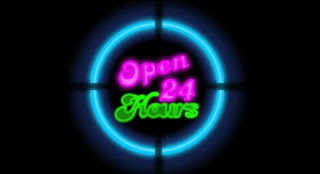
Neon Sign | ||||||||
We'll begin this tutorial by coloring the canvas (341 x 185) Black, then choose the "Elipse Tool" and draw a circle as I have done below using the color 1496e8. | ||||||||
 | ||||||||
Duplicate the circle layer, then go to the main menu and select "Edit" then "Free Transform" and reduce the size 10% as I have shown below. | ||||||||
 | ||||||||
Now "Ctrl" click the new layer to create a selection around it and delete the new layer, then "Rasterize" the first circle that you drew and hit "Delete" on your keyboard. Deselect the selection so you have what I have below. | ||||||||
 | ||||||||
Next, using the "Rectangular Marquee Tool" create a selection as illustrated below and hit "Delete" on your keyboard. | ||||||||
 | ||||||||
Create, a vertical selection using the "Rectangular Marquee Tool" to create a selection and hit "Delete" on your keyboard again. You should then have the following: | ||||||||
 | ||||||||
Now, create a new layer, then go ahead and grab the "Eliptical Marquee Tool" and draw a selection in the middle of the previous circle. Next go to the main menu and select "Edit" then "Stroke". Choose White as the color at 1 pixels and center. Click "OK". | ||||||||
 | ||||||||
Next Go to "Filter" then "Blur" then "Gaussian Blur" and use the following settings. | ||||||||
 | ||||||||
Now, "Ctrl" click the rasterized blue circle layer to put a selection around it. Then go to the main menu and choose "Select" then "Inverse". Hit "Delete" on your keyboard, then deselect the selection. You should now have the following. | ||||||||
 | ||||||||
| ||||||||
You should now have the following. | ||||||||
 | ||||||||
Next, duplicate the layer twice then hit the eye next to one of the duplicated layers so it is invisible and merge the two new layers. Go to "Filter" then "Blur" then "Radial Blur" and use the following settings. | ||||||||
 | ||||||||
Drag the merged layer so it is just above the "Background" layer. You should now have the following: | ||||||||
 | ||||||||
Next, go to the main menu and select, "Image", "Adjustments" and then "Hue/Saturation" and use these settings. | ||||||||
 | ||||||||
You should now have the following: | ||||||||
 | ||||||||
Now grab the "Text Tool" - I chose the graffitti typeface "PT Banana Split" (an easy find using Google) at a size of 36 with White as the color. | ||||||||
 | ||||||||
Then go to the main menu and select "Edit" then "Free Transform" and angle the text layer as I have done below. | ||||||||
 | ||||||||
| ||||||||
Now "Ctrl" click the "Open" text layer to create a selection around it and go to "Selection" then "Modify" and lastly "Contract" by 2. Create a new layer and fill the selection with White. Turn the "Opacity" down to 44%. You should now have the following: | ||||||||
 | ||||||||
Grab the "Text Tool" again and type "24" and use the same settings as in steps 18 and 20. | ||||||||
 | ||||||||
Grab the "Text Tool" one last time and type "Hours" as I have done below. | ||||||||
 | ||||||||
| ||||||||
You should now have the following: | ||||||||
 | ||||||||
Now "Ctrl" click the "Hours" text layer to create a selection around it and go to "Selection" then "Modify" and lastly "Contract" by 2 again. Create a new layer and fill the selection with White. | ||||||||
 | ||||||||
| ||||||||
The Results!!! | ||||||||
Turn the Opacity for that layer down to 50%...and we're open for business. Great job!!! | ||||||||
 | ||||||||


0 komentar:
Posting Komentar