With this year's Super Bowl coming up, all of the major electronics stores have been filling their websites and weekly flyers with pictures of the latest high definition tv's showing the big game. If it's not a major sports event being displayed on the screens, it's usually the latest blockbuster DVD movie release or big budget video game.
Of course, none of these images are really being displayed on the screen, since it's next to impossible to take a high quality photo of something appearing on tv. It's all done in Photoshop. An image of whatever it is they want to have appearing on tv is simply pasted into the image of the tv itself.
In this Photoshop tutorial, we're going to see how it's done so you can use the same technique with your own images!
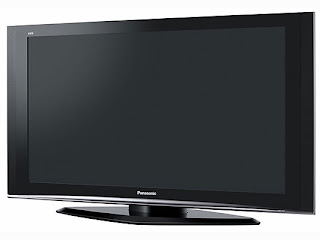
Here, I have an image of the sort of tv you'd probably find in an electronics store's flyer:
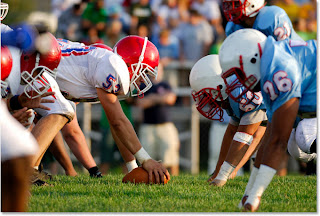
 And here's the image I want to have appearing on the tv:
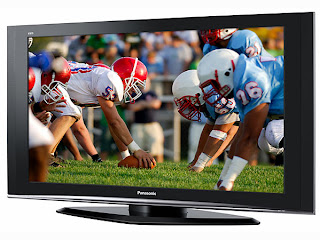
 Here's what it's going to look like when we're done:
Step 1: Select The Area You Want To Paste The Second Image Into
First, open the image you want to place the second image into and draw a selection around the area where the second image is going to appear. The selection tool you use will of course depend on the shape of the area you need to select. I want my second image to appear inside the tv screen, which is a simple four-sided shape, so I'm going to use Photoshop's Polygonal Lasso Tool, which by default is hiding behind the standard Lasso Tool in the Tools palette. I'm going to click on the Lasso Tool icon, then I'll hold my mouse button down for a second or two until the fly-out menu appears, and then I'll select the Polygonal Lasso Tool from the list:
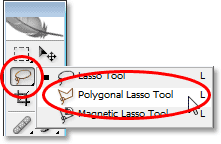 The Polygonal Lasso Tool allows you to draw a selection by simply clicking at different points where the direction of the selection needs to change. Each time you click at a new point, Photoshop will add a straight line between the new point and the last point you clicked on, similar to how the Pen Tool works when drawing straight path segments. You simply continue clicking around the area that needs to be selected until you've outlined the entire area and you've made your way back to the beginning. When you click again on that first point, Photoshop will create the selection.
 Selecting the tv screen with the Polygonal Lasso Tool is easy. All I need to do is click in each of the four corners. I'll start with the top left corner, then make my way down to the bottom left corner, then over to the bottom right corner, and up to the top right corner. We can see the three lines that have been created so far:
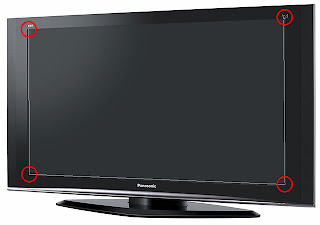 To complete the selection, I'll click once again on the same spot I started with in the top left corner of the tv screen, and Photoshop will create my selection for me:
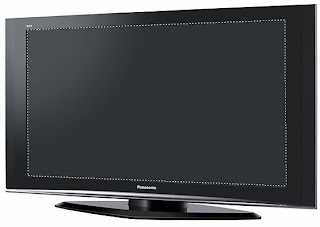
Step 2: Copy The Second Image To The Clipboard
Open your second image in Photoshop and press Ctrl+A (Win) / Command+A (Mac) to place a selection around the entire image:
 Then press Ctrl+C (Win) / Command+C (Mac) to copy the image to the clipboard.
 Step 3: Paste The Second Image Into The Selection
Switch back to your original image in Photoshop. You should still see the selection you created a moment ago. We're going to paste the second image directly into this selection. To do that, go up to the Edit menu at the top of the screen and choose Paste Into:
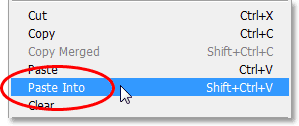
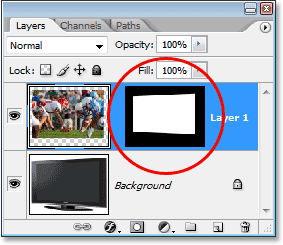
Three things will happen to the original image when you choose "Paste Into". Photoshop will add a new layer above the Background layer in the Layers palette, it will place the second image on to the new layer, and it will use the selection we made to create a Layer Mask, which will hide all areas of the second image that fall outside of the selection, leaving only the area inside the selection visible. In other words, the only part of my football image that will be visible is the area that fits inside the selection I made around the tv screen.
First, let's look at the Layers palette for the original image to see what's happened. We can see that I now have two layers - the original Background layer on the bottom which contains my tv image, and the new layer, "Layer 1", above it which contains the football photo. We can also see the layer mask thumbnail (circled in red) showing us the layer mask that was created. The white, rectangular-shaped area in the center of the thumbnail is the area that was selected (the tv screen), and all the black area around it is the area that was not selected:
 And if we look at the image itself, we can now see the football image appearing on the tv screen:
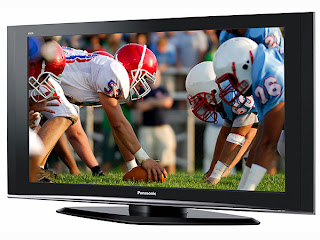
Step 4: Resize The Second Image With Free Transform
The only problem at the moment is that the tv is on an angle and the photo I've pasted into it is not, so the perspective between the two images isn't matching up. To fix that, I'll press Ctrl+T (Win) / Command+T (Mac) to bring up Photoshop's Free Transform box and handles around the second image. The first thing I'm going to do is try to fit as much of the football photo into the tv screen as I can, so I'll hold down Shift+Alt (Win) / Shift+Option (Mac) and drag one of the four corner handles in towards the center to make the image smaller. Holding "Shift" constrains the proportions of the image as I drag so I don't accidentally distort the look of the image, and holding down "Alt/Option" tells Photoshop to resize the image from its center, which makes things easier:
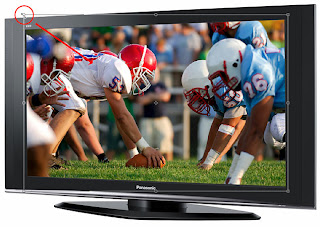
Now that I'm happy with the size of my second image, I'm going to fix the perspective problem. With Free Transform still active, I'm going to hold down Shift+Ctrl+Alt (Win) / Shift+Command+Option (Mac), which temporarily turns Free Transform into Perspective transform mode. You could also go up to the Edit menu, choose Transform, and then choose Perspective, but the keyboard shortcut is easier if you already have the Free Transform handles active.
In Perspective transform mode, I'm going to click again on the handle in the top left corner and drag it down a little. As I drag the top left corner handle down, the handle in the bottom left corner is going to move up at the same time. This will allow me to reduce the height of the left side of the football image without affecting the height of the right side of the image, creating the illusion that the image is on the same angle as the tv:
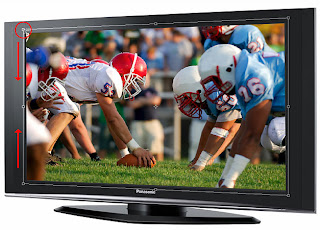
Now that I'm happy with the size and angle of the second image, I'll press Enter (Win) / Return (Mac) to accept the changes and exit out of the Free Transform command.
Step 5: Add An Inner Shadow Layer Style
To finish off the effect, I'm going to add a slight shadow to the edges of the football image so it looks more like it's actually displaying on the tv screen and less like someone just pasted it on there (even though that's exactly what we did). With "Layer 1" selected, I'll click on the Layer Styles icon at the bottom of the Layers palette and I'll select Inner Shadow from the list of layer styles:
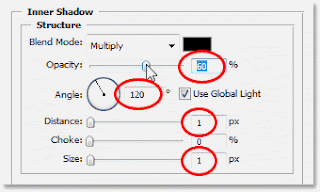
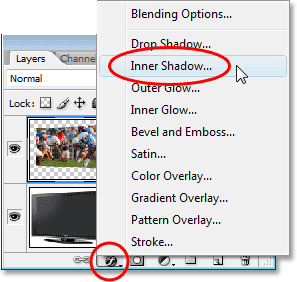 This brings up Photoshop's Layer Style dialog box set to the Inner Shadow options in the middle column. Lower the Opacity of the Inner Shadow to around 60% so it's not quite as intense, then lower both the Size and Distance down to 1 px. You may also need to adjust the Angle of the shadow depending on your image. I have mine set to 120°:
Click OK to exit out of the Layer Style dialog box and apply the shadow, and you're done!
Here, after adding my shadow effect around the edges of the football image so it looks more natural on the tv screen, is my final result:
 Photoshop Effects: The final result.


0 komentar:
Posting Komentar